Connecting Remote Robots Using ROS2, Docker & VPN

ROS 2 is a next gen Robot Operating System, a leading middleware and ecosystem for developing software for autonomous robots and even for autonomous vehicles. ROS provides a decentralized architecture with so called Nodes responsible for specific tasks as complex as path planning, SLAM (Simultaneous Localization and Mapping) or just processing single sensor data.
ROS 2 nodes can automatically discover each other when ROS 2 powered robots or computers are connected to the same Wi-Fi network. Doing the same over the internet is more challenging. I will however show you how to do that in an easy way!
In this article you will learn:
- how to connect ROS 2 nodes running in different networks to a single ROS 2 system
- how to install, configure and use VPN client
- how to configure DDS to enable communication over VPN
- how to do everything above with Docker and Docker-Compose to make your life easier
Let's do it!
Example Overview
To focus purely on connectivity, not on running fancy ROS 2 software or doing complex simulations in Gazebo, I will go through different scenarios based on a simple ROS 2 system consisting of 3 nodes:

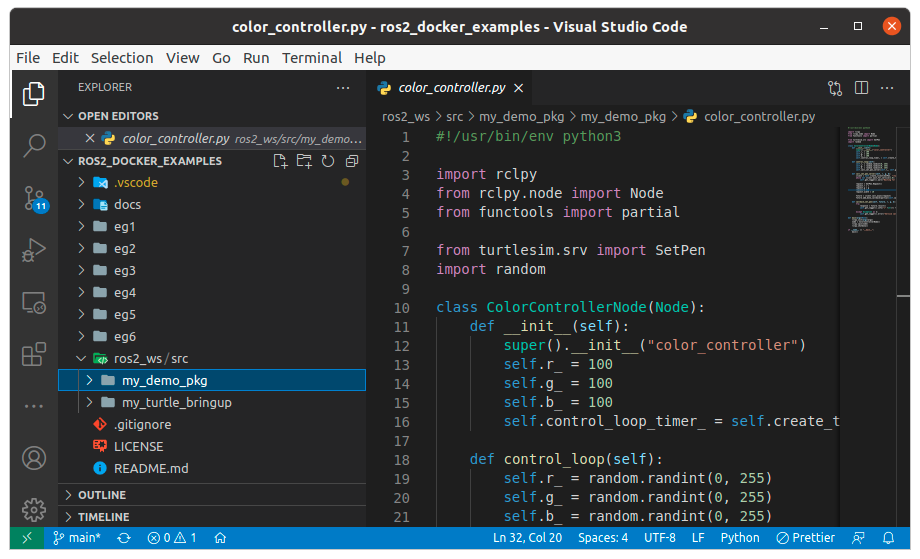
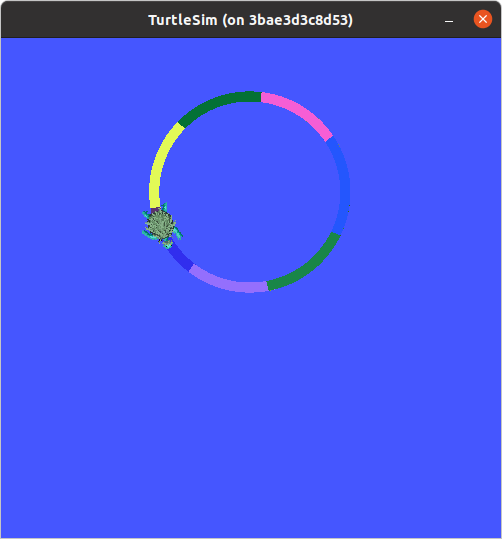
/turtlesim- a very simple, simulator for learning ROS where you simulate ... a turtle :)/move_controller- node for controlling the movement of the turtle/color_controller- node that is changing the color of the line drawn by a turtle each second
In the next sections we will run the same code, but in differnet setups; on one or multiple hosts using Docker.
All example scenarios and custom ROS 2 node definitions you can find in this github repository: https://github.com/DominikN/ros2_docker_examples .
This repository has the following structure:
ros2_wsfolder contains definitions of/move_controllerand/color_controllerROS 2 nodeseg1...6folders contain multiple, dockerized ways to run the same ROS 2 nodes
The solution is scalable, so what you will learn in this tutorial can be applied in very complex distributed ROS 2 systems as well!
If you have ROS 2 already installed on your laptop, to run the demo you will need to execute the following command in the Linux terminal:
git clone https://github.com/DominikN/ros2_docker_examples.git
cd ros2_docker_examples
cd ros2_ws
colcon build

source /opt/ros/foxy/setup.bash
source install/setup.bash # full path might be: ~/ros2_docker_examples/ros2_ws/install/setup.bash

ros2 launch my_turtle_bringup turtlesim_demo.launch.py
And the result is...
If you don't have ROS 2 installed - don't worry, Docker and Docker-Compose is enough.
Installing Docker
Make sure you have Docker and Docker-Compose installed on your laptop.
The official instruction is the best tutorial, but here's a quick rundown for you:
- Linux
- Windows
- MacOS
In your Linux distribution it may look different, but on Ubuntu 20.04, simply execute those commands in the terminal:
sudo -E apt-get -y install apt-transport-https ca-certificates software-properties-common && \
curl -sL https://download.docker.com/linux/ubuntu/gpg | sudo apt-key add - && \
arch=$(dpkg --print-architecture) && \
sudo -E add-apt-repository "deb [arch=${arch}] https://download.docker.com/linux/ubuntu $(lsb_release -cs) stable" && \
sudo -E apt-get update && \
sudo -E apt-get -y install docker-ce docker-compose
sudo systemctl daemon-reload
sudo systemctl restart docker
Here's a link for Windows Installer: https://docs.docker.com/docker-for-windows/install/
Here's a link for Windows Installer: https://docs.docker.com/docker-for-mac/install/
Running on the Same Host
In a Single Container

Thanks to Docker you do not need to have ROS 2 installed on your laptop. To run a demo there are only two files needed:
- Dockerfile
- ros_entrypoint.sh
FROM osrf/ros:foxy-desktop

SHELL ["/bin/bash", "-c"]

WORKDIR /app

COPY ros2_ws ros2_ws/
RUN cd ros2_ws && \
    source /opt/ros/foxy/setup.bash && \
    colcon build

COPY eg1/ros_entrypoint.sh /

ENTRYPOINT ["/ros_entrypoint.sh"]
CMD ["bash"]
#!/bin/bash
set -e

source /opt/ros/foxy/setup.bash
source /app/ros2_ws/install/setup.bash

exec "$@"
Execute in the Linux terminal the following lines to run the example:
cd ros2_docker_examples

sudo chmod +x eg1/ros_entrypoint.sh

sudo docker build -t turtle_demo -f eg1/Dockerfile .

xhost local:root

sudo docker run --rm -it \
--env DISPLAY \
--volume /tmp/.X11-unix:/tmp/.X11-unix:rw \
turtle_demo \
ros2 launch my_turtle_bringup turtlesim_demo.launch.py
We start all ROS 2 nodes here from a single launch file ros2_docker_examples/ros2_ws/my_turtle_bringup/turtlesim_demo.launch.py - all nodes run in a single docker container.
You should see a turtle drawing a multi-color line like before
In Two Containers
The example presented above is very simple and it works, however it's not a good practice to run everything in a single container. Especially if you have more complex ROS 2 project than mine (which, let's face it, is quite a probable scenario 🙂).

- Dockerfile
- ros_entrypoint.sh
- docker-compose.yml
FROM osrf/ros:foxy-desktop

SHELL ["/bin/bash", "-c"]

WORKDIR /app

COPY ros2_ws ros2_ws/
RUN cd ros2_ws && \
    source /opt/ros/foxy/setup.bash && \
    colcon build

COPY eg2/ros_entrypoint.sh /

ENTRYPOINT ["/ros_entrypoint.sh"]
CMD ["bash"]
#!/bin/bash
set -e

source /opt/ros/foxy/setup.bash
source /app/ros2_ws/install/setup.bash

exec "$@"
version: '2'

services:
    turtle_controller:
        build:
            context: ../
            dockerfile: eg2/Dockerfile
        command: ros2 launch my_turtle_bringup only_controller.launch.py
    turtle_sim:
        image: osrf/ros:foxy-desktop
        environment:
            - DISPLAY
        volumes:
            - /tmp/.X11-unix:/tmp/.X11-unix:rw
        command: ros2 run turtlesim turtlesim_node
        depends_on:
            - turtle_controller
In the example we have basically two types of nodes, from two packages:
/turtlesim- that node is provided by a third party and is a standard, pre-installed ROS package, so we can run it without even building our own container/color_controllerand/move_controllerare a part of our custommy_demo_pkgpackage (created by us). Let's create our own, custom container to run only those two custom Nodes.
The multi-container setup, running on the same host can be described in a clean and elegant way thanks to docker-compose.yml, so to start the example we need to type only these two lines in a Linux terminal:
cd eg2
docker-compose up --build
Result is the same:

Note that we do not need to care about autodiscovery, because DDS (Data Distribution Service) does it for us. DDS is a publish-subscribe transport layer that ROS 2 is based on. Thanks to DDS, ROS 2 system doesn't need ROS master node as ROS 1 did. Services provided by Nodes are automatically detected by other Nodes within the same network.
Between RCL (ROS Client Library) and DDS, there is another layer called RMW (ROS 2 Middleware) providing an interface for DDS implementation from multiple vendors - like Cyclone DDS used in the article.
Each running container automatically detects ROS 2 services, topics and actions from other running containers.
Autodiscovery works out of the box for Nodes operating in the same network: that means connected to the same Wi-Fi router or working on the same host with a virtual network provided by Docker. Nodes running on your laptop and on your robot will detect each other if they are in the same LAN (that is sometimes problematic if your colleagues work on their own robots in the same network as yours).
But what if we want to run the system across multiple networks? Maybe we want to offload the robot and perform some computing on the remote server? In such a case DDS autodiscovery will not work without additional configuration.
PROBLEM: Remote Hosts Without Static IP

Because two ROS 2 devices are in different networks, DDS can not perform auto-discovery.
Also devices can not reach each other because they do not have neither public nor static IP addresses and are behind Wi-Fi router NAT.
To allow the containers see each other, we need to configure a VPN... Husarnet VPN.
Husarnet is an Open Source peer-to-peer VPN Client designed with mobile robotics applications in mind.
Husarnet VPN Client features:
- 🚀 low latency connection
- ⚙️ zero configuration
- 🎈 lightweight and ultra-fast
- ⏱️ low reconfiguration time ~3 seconds (changing a network topology - eg. switching from Wi-Fi to LTE)
- 🔒 strong cryptography - PFS enabled by default
- 🍻 easy VPN network sharing (so also your devices) with other users
- 🔗 multi-VPN network operation
You can read more about technical aspects of Husarnet here.
After the Husarnet VPN Client is installed, to connect a device / container to the specific network Husarnet Join Code is needed.
You will find your Join Code on your account at app.husarnet.com (up to 5 Husarnet Client instances it's free).
Default DDS implementation used in ROS 2 Foxy is FastRTPS. Starting ROS 2 Galactic the default RMW (ROS Middleware) is Cyclone DDS. Configuration file of Cyclone DDS is shorter, so in the next sections we will focus on the Cyclone, even while working on Foxy.
Getting a VPN Join Code
To get your own Join Code, only 4 easy steps are needed:
- 1. Create Account
- 2. Confirm e-mail
- 3. Create a Network
- 4. Copy a Join Code
Create a free account at https://app.husarnet.com
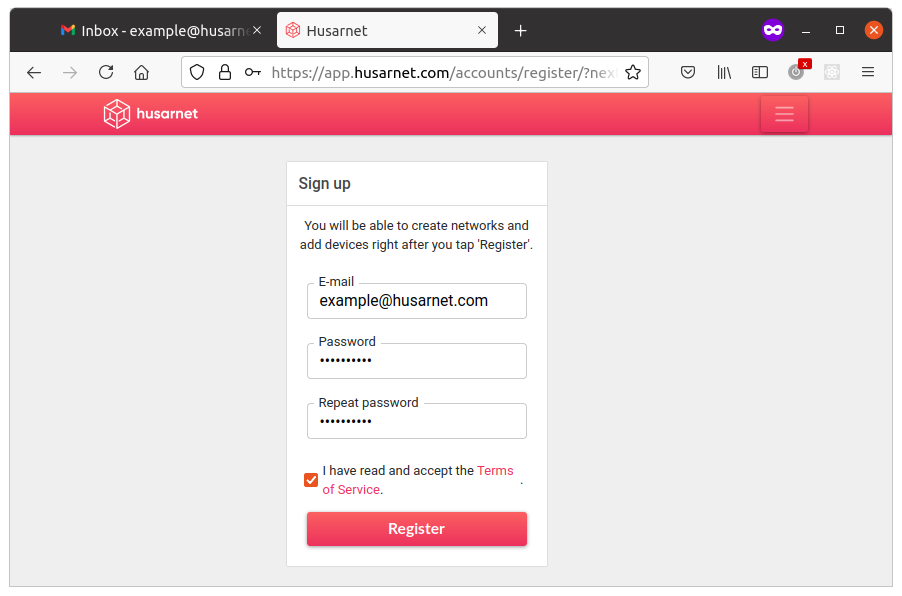
After you click "Register" you will be redirected to your account where your will see:
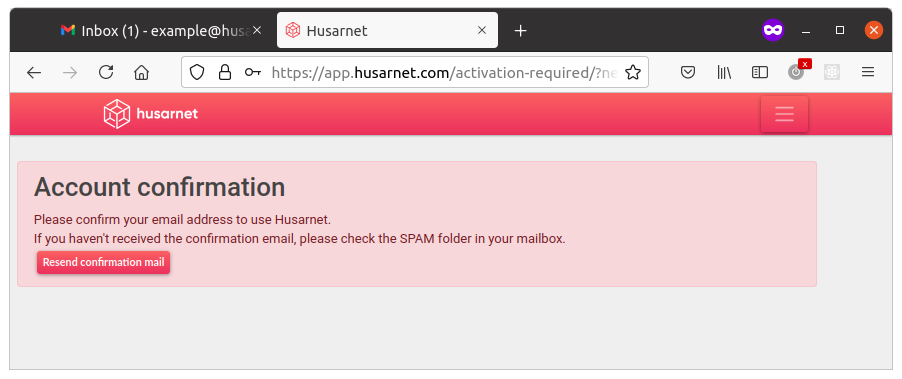
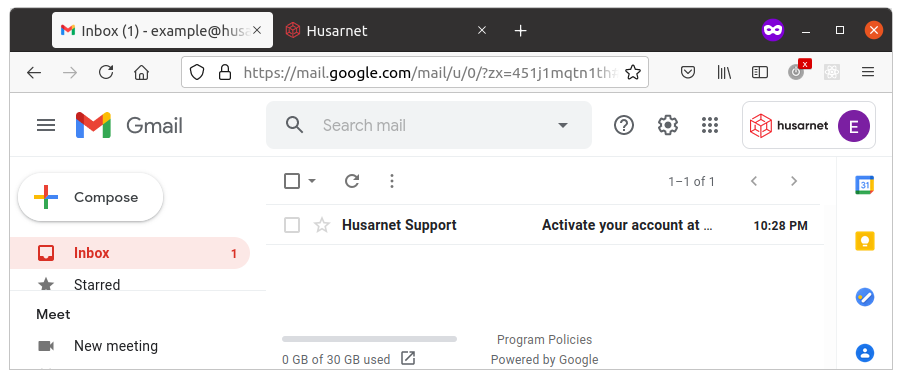
Please click the confirmation link in the e-mail you should have just received:
After you click the confirmation e-mail you will see your account with no networks:
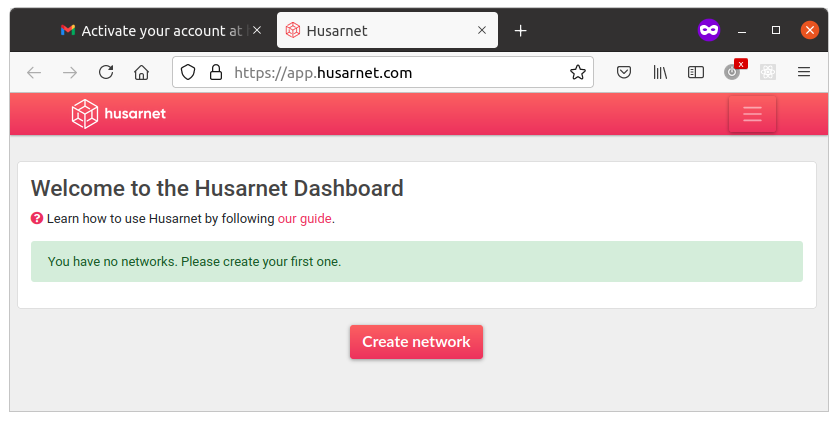
Click a [Create network] button and name your first network, eg. my_network:
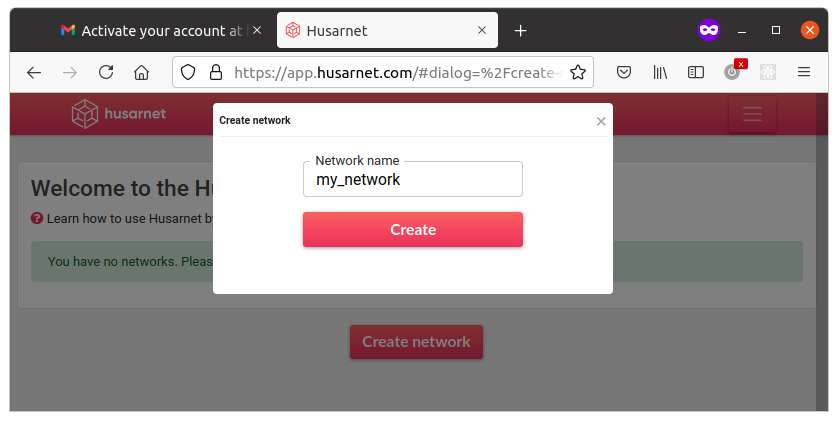
After you create a new network you will see:
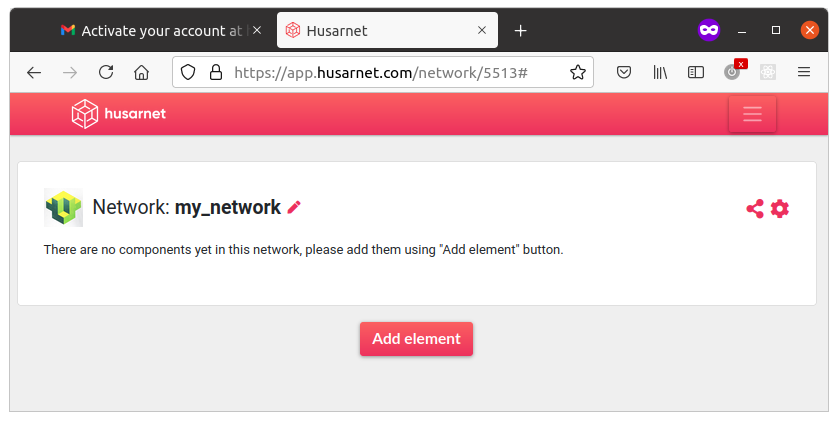
Click [Add element] button and you will see a window with your Join Code:
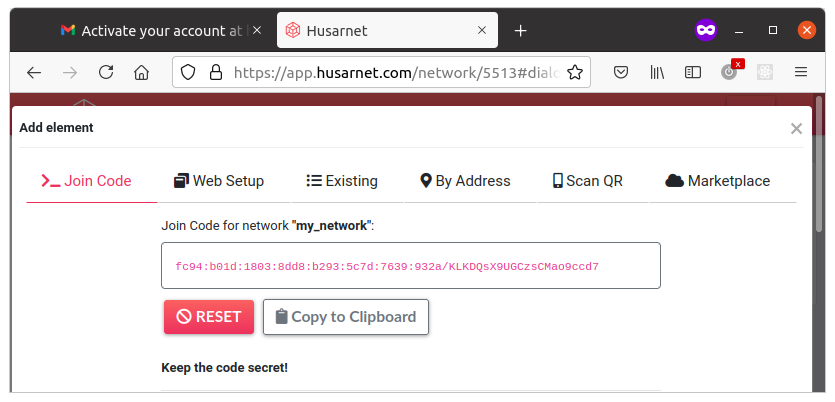
In our example the Join Code is:
fc94:b01d:1803:8dd8:b293:5c7d:7639:932a/KLKDQsX9UGCzsCMao9ccd7
Save it for next steps.
SOLUTION 1: Installing a VPN Client Inside a Container

In this section we will install a VPN Client inside the container. I will also present how to change a custom DDS configuration.
In the next section I will show you how to achieve the same result, but in more elegant way, without modifying existing containers at all.
The Source Code Overview
Ready to use example is available in eg3/ folder. There are two separate subfolders with a docker-compose.yml file which should be launched on two separate devices operating in the same or different networks.
- Dockerfile
- ros_entrypoint.sh
- cyclonedds.xml
- docker-compose.yml
FROM osrf/ros:foxy-desktop

SHELL ["/bin/bash", "-c"]

# Install Husarnet Client
RUN apt update -y
RUN apt install -y curl gnupg2 systemd
RUN curl https://install.husarnet.com/install.sh | bash
RUN update-alternatives --set ip6tables /usr/sbin/ip6tables-legacy

# Install ROS 2 deppendencies (Cyclone DDS)
RUN sudo apt update && \
    sudo apt install -y \
    ros-foxy-rmw-cyclonedds-cpp
RUN sudo rm -rf /var/lib/apt/lists/*

# Find your JOINCODE at https://app.husarnet.com
ENV JOINCODE=""
ENV HOSTNAME=my-container-1


WORKDIR /app

COPY ros2_ws ros2_ws/
RUN cd ros2_ws && \
    source /opt/ros/foxy/setup.bash && \
    colcon build

COPY eg3/dev1/ros_entrypoint.sh /
COPY eg3/dev1/cyclonedds.xml .

ENTRYPOINT ["/ros_entrypoint.sh"]
CMD ["bash"]
#!/bin/bash
set -e

source /opt/ros/foxy/setup.bash
source /app/ros2_ws/install/setup.bash
export RMW_IMPLEMENTATION=rmw_cyclonedds_cpp
export CYCLONEDDS_URI=file:///app/cyclonedds.xml

function get_status() {
    local status="success"

    while read line; do
        if [[ $line == *"ERROR"* ]]; then
            status="waiting..."
        fi
    done
    echo $status
}

function print_instruction() {
    local ipv6addr="::"

    while read line; do
        if [[ $line == *"Husarnet IP address:"* ]]; then
            ipv6addr=${line#*"Husarnet IP address: "}
        fi
    done

    echo "*******************************************"
    echo "💡 Tip"
    echo "IPv6 addr of this container is: ${ipv6addr}"
    echo "*******************************************"
    echo ""
}

if [[ ${JOINCODE} == "" ]]; then
    echo ""
    echo "ERROR: No JOINCODE provided in \"docker run ... \" command. Visit app.husarnet.com to get a JOINCODE"
    echo ""
    /bin/bash
    exit
fi

echo ""
echo "⏳ [1/2] Initializing Husarnet Client:"
sudo husarnet daemon > /dev/null 2>&1 &

for i in {1..10}
do
    sleep 1

    output=$( get_status < <(sudo husarnet status) )
    echo "$output"

    if [[ $output != "waiting..." ]]; then
        break
    fi
done

echo ""
echo "🔥 [2/2] Connecting to Husarnet network as \"${HOSTNAME}\":"
sudo husarnet join ${JOINCODE} ${HOSTNAME}
echo "done"
echo ""

print_instruction < <(sudo husarnet status)

exec "$@"
<?xml version="1.0" encoding="UTF-8" ?>
<CycloneDDS xmlns="https://cdds.io/config" xmlns:xsi="http://www.w3.org/2001/XMLSchema-instance" xsi:schemaLocation="https://cdds.io/config https://raw.githubusercontent.com/eclipse-cyclonedds/cyclonedds/master/etc/cyclonedds.xsd">
    <Domain id="any">
        <General>
            <NetworkInterfaceAddress>hnet0</NetworkInterfaceAddress>
            <AllowMulticast>false</AllowMulticast>
            <MaxMessageSize>65500B</MaxMessageSize>
            <FragmentSize>4000B</FragmentSize>
            <Transport>udp6</Transport>
        </General>
        <Discovery>
            <Peers>
                <Peer address="fc94:406d:ec8a:01e7:6c06:4898:9d68:c6d0"/>
            </Peers>
            <ParticipantIndex>auto</ParticipantIndex>
        </Discovery>
        <Internal>
            <Watermarks>
                <WhcHigh>500kB</WhcHigh>
            </Watermarks>
        </Internal>
        <Tracing>
            <Verbosity>severe</Verbosity>
            <OutputFile>stdout</OutputFile>
        </Tracing>
    </Domain>
</CycloneDDS>
version: "2.3"  # https://docs.docker.com/compose/compose-file/

services:
    turtle_controller:
        build:
            context: ../../
            dockerfile: eg3/dev1/Dockerfile
        volumes:
            - /var/lib/husarnet  # This will persist your Husarnet Client keys, thus IP of the container will be stable/the same between boots
        env_file:
            - ./.env  # create .env file in the same folder as Dockerfile and specify HOSTNAME and JOINCODE there
        sysctls:
            - net.ipv6.conf.all.disable_ipv6=0
        cap_add:
            - NET_ADMIN
        devices:
            - /dev/net/tun
        stdin_open: true # docker run -i
        tty: true        # docker run -t
        command: ros2 launch my_turtle_bringup only_controller.launch.py
To the Dockerfile from previous steps I added a few lines to install and configure CycloneDDS and Husarnet VPN. We are using a custom cyclonedds.xml file where we can specify addresses of "peers" - simply other devices running ROS 2 nodes we want to connect (you can paste here Husarnet IPv6 addr or Hostnames of your peers). docker-compose.yml presents a configuration needed by a specific container.
ros_entrypoint.sh seems to be long, but most lines are basically for a pretty terminal output. Minimal configuration to start a Husarnet Client daemon is:
sudo husarnet daemon > /dev/null 2>&1 &
sleep 5 # wait until Husarnet daemon is ready
sudo husarnet join ${JOINCODE} ${HOSTNAME}
Note that, to run Husarnet on your host system you don't need to start the Husarnet daemon explicite (like we did here in the Docker container) because the process is being managed by a systemd. Docker images don't have systemd (and there are good reasons why) this is why a launching script needs an extra sudo husarnet daemon > /dev/null 2>&1 & line.
As an example - on standard desktop distribution of Ubuntu 20.04, all you need to do is to install Husarnet and connect your host to a Husarnet network:
## 1. Install Husarnet
curl https://install.husarnet.com/install.sh | sudo bash

## 2. Reload systemd starting Husarnet daemon
sudo systemctl restart husarnet

## 3. Join the VPN network
sudo husarnet join ${JOINCODE} ${HOSTNAME}
Connecting to the VPN network
At first modify eg3/dev1/.env and eg3/dev2/.env files by providing the same Husarnet network Join Code there.
JOINCODE=fc94:b01d:1803:8dd8:b293:5c7d:7639:932a/xxxxxxxxxxxxxxxxxxxxxx
HOSTNAME=turtle-controller
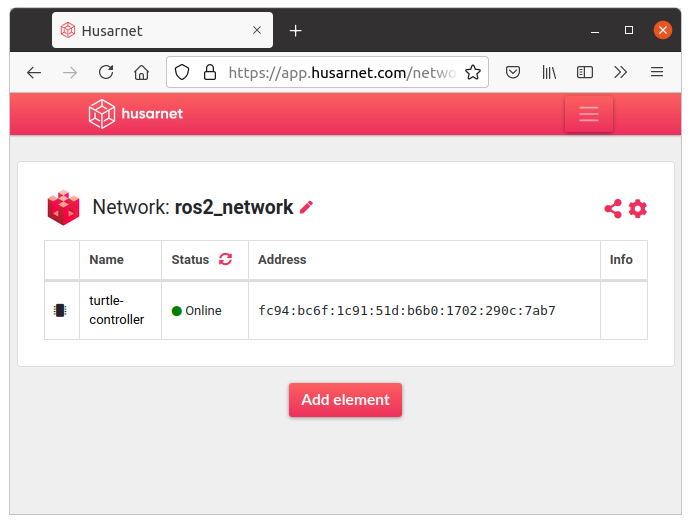
1. Start the first device:
cd eg3/dev1
docker-compose up --build
After a while you should see your first device connected to the Husarnet network:
2. Add the first device address to Peers list of the second device, by editing: eg3/dev2/cyclonedds.xml file:
...
<Discovery>
    <Peers>
        <Peer address="fc94:bc6f:1c91:51d:b6b0:1702:290c:7ab7"/>
    </Peers>
    <ParticipantIndex>auto</ParticipantIndex>
</Discovery>
        ...
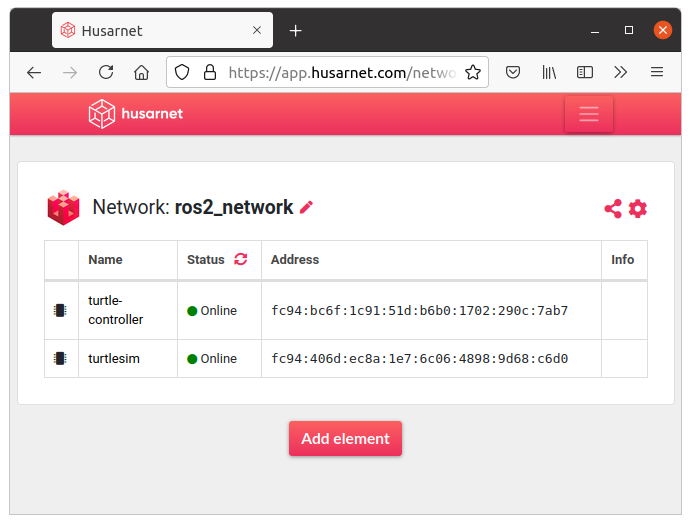
3. Start the second device:
cd eg3/dev2
docker-compose up --build
You should now see two devices in the Dashboard:
Problem: turtle is not moving!
Solution: while starting dev1 we did not know the IPv6 address of the second device, but we know it now.
4. Kill Docker-Compose on the first device (ctrl + c). Add the seconds device address to the Peers list of the first device, by editing: eg3/dev1/cyclonedds.xml file:
...
<Discovery>
    <Peers>
        <Peer address="fc94:406d:ec8a:1e7:6c06:4898:9d68:c6d0"/>
    </Peers>
    <ParticipantIndex>auto</ParticipantIndex>
</Discovery>
...
5. Restart the first device container and everything should look fine now:
cd eg3/dev1
docker-compose up --build
It works, but there are a few things that we don't like:
-
we don't know IPv6 addresses of the containers before starting them. So we need to make a dummy start of the first container, just to get the IPv6 address to be written in
cyclonedds.xmlof the second container. -
we need to modify containers which we already have (installing VPN client within a containers)
We will fix those issues in the next example.
SOLUTION 2: Using a Separate VPN Container
Instead of modyfing your own containers, you can launch a separate official Husarnet VPN container next to your existing app container. You can read more about the VPN container in the previous blog post.
hnet0 network interface from Husarnet container is shared with any container you specify in the docker-compose.yml. Thanks to that without modyfying your exisitng containers with ROS 2 nodes, you can connect them with remote nodes without any effort.
Moreover instead of long IPv6 addresses (in cyclonedds.xml - <Peers> section) you can use Husarnet hostnames of the Husarnet Container (specified in eg4/dev*/.env files).

That's a truely zero effort solution that simply works.
TL;DR:
Running the example
1st Device
Clone this repo to the first device, then execute the following command in the terminal:
cd ros2_docker_examples/eg4/dev1

# Add your own join code to the .env file in the current directory.
# Example .env file content:
#
# JOINCODE=fc94:b01d:1803:8dd8:b293:5c7d:7639:932a/tTZtwiqM59iXtnCWABUEKH
# HOSTNAME=turtle-controller-1

docker-compose up --build
2nd Device
Clone this repo to the second device, then execute the following command in the terminal:
xhost local:root

cd ros2_docker_examples/eg4/dev2

# Add your own join code to the .env file in the current directory.
# Example .env file content:
#
# JOINCODE=fc94:b01d:1803:8dd8:b293:5c7d:7639:932a/tTZtwiqM59iXtnCWABUEKH
# HOSTNAME=turtlesim-1

docker-compose up --build
Notes
Note that we haven't modified cyclonedds.xml file, because we specified hostnames of Husarnet containers there (that we knew before connecting device to the Husarnet network and we pasted them before in .env file) insted of IPv6 addresses.
Connecting existing ROS 2 Docker Images
OK, pretty nice, but we still needed to create a custom Dockerfile even just for running a turtlesim. Our next goal is to find a way to do not build a special Docker Images "working with Husarnet", and with embedded custom cyclonedds.xml, but run any existing ROS 2 image, by just applying the proper configuration in the Docker Compose.
The whole demo is located in the ros2_docker_examples/eg5 folder, than dev1 and dev2 subfolders (you can run those images as before - on one or multiple hosts - will work the same in both scenarios).
This time let's focus on the host running turtlesim package. It is a standard package, already existing in the official osrf/ros:galactic-desktop Docker image by OSRF. To run turtlesim from that image you do not need any custom Dockerfile; dev2 subfolder contains only the following files:
- docker-compose.yml
- cyclonedds.xml
version: '2.3'

services:
    turtle_sim:
        image: osrf/ros:galactic-desktop
        environment:
            - DISPLAY
        volumes:
            - /tmp/.X11-unix:/tmp/.X11-unix:rw
            - ./cyclonedds.xml:/cyclonedds.xml
        command:
            - bash
            - -c
            - |
                export CYCLONEDDS_URI=file:///cyclonedds.xml
                ros2 run turtlesim turtlesim_node
        network_mode: service:husarnet  # This will put the Husarnet Client in the same network namespace as your app (in this example: turtle_sim)

    husarnet:
        image: husarnet/husarnet
        restart: unless-stopped
        volumes:
            - /var/lib/husarnet  # This will persist your Husarnet Client keys, thus IP of the container will be stable/the same between (re)boots
        sysctls:
            - net.ipv6.conf.all.disable_ipv6=0  # Husarnet is using IPv6 for the internal connections
        cap_add:
            - NET_ADMIN
        devices:
            - /dev/net/tun
        env_file:
            - ./.env  # create .env file in the same folder as Dockerfile and specify HOSTNAME and JOINCODE there
<?xml version="1.0" encoding="UTF-8" ?>
<CycloneDDS xmlns="https://cdds.io/config" xmlns:xsi="http://www.w3.org/2001/XMLSchema-instance" xsi:schemaLocation="https://cdds.io/config https://raw.githubusercontent.com/eclipse-cyclonedds/cyclonedds/master/etc/cyclonedds.xsd">
    <Domain id="any">
        <General>
            <NetworkInterfaceAddress>hnet0</NetworkInterfaceAddress>
            <AllowMulticast>false</AllowMulticast>
            <MaxMessageSize>65500B</MaxMessageSize>
            <FragmentSize>4000B</FragmentSize>
            <Transport>udp6</Transport>
        </General>
        <Discovery>
            <Peers>
                <Peer address="turtle-controller"/>
            </Peers>
            <ParticipantIndex>auto</ParticipantIndex>
        </Discovery>
        <Internal>
            <Watermarks>
                <WhcHigh>500kB</WhcHigh>
            </Watermarks>
        </Internal>
        <Tracing>
            <Verbosity>severe</Verbosity>
            <OutputFile>stdout</OutputFile>
        </Tracing>
    </Domain>
</CycloneDDS>
The Cyclone DDS configuration file is being provided by using a bind-mount volume in docker-compose.yml and to use that custom configuration file before running the proper ROS 2 node, the command: requires some additional lines:
command:
  - bash
  - -c
  - |
    export CYCLONEDDS_URI=file:///cyclonedds.xml
    ros2 run turtlesim turtlesim_node
In every step of this tutorial, we keep the functionality the same, but we improve the system architecture. Now it is almost perfect, but let's improve it even further.
SOLUTION 3: Using VPN Container + Multiple ROS containers

As mentioned at the beginning, it is a good practice to keep a single Docker container as lean as possible. So let's run all three ROS 2 Nodes we have in the project in separate Docker containers, keeping the system configuration simple and transparent.
Running the example
1st Device
Clone this repo to the first device, then execute the following command in the terminal:
cd ros2_docker_examples/eg6/dev1

# Add your own join code to the .env file in the current directory.
# Example .env file content:
#
# JOINCODE=fc94:b01d:1803:8dd8:b293:5c7d:7639:932a/tTZtwiqM59iXtnCWABUEKH
# HOSTNAME=turtle-controller

docker-compose up --build
2nd Device
Clone this repo to the second device, then executethe following command in the terminal:
xhost local:root

cd ros2_docker_examples/eg6/dev2

# Add your own join code to the .env file in the current directory.
# Example .env file content:
#
# JOINCODE=fc94:b01d:1803:8dd8:b293:5c7d:7639:932a/tTZtwiqM59iXtnCWABUEKH
# HOSTNAME=turtlesim

docker-compose up --build
And on the 2nd device's screen we can see our shelly friend:
(the same as in all previous examples)
Sharing VPN across multiple containers
- docker-compose.yml
- cyclonedds.xml
- Dockerfile
- ros_entrypoint.sh
version: '2.3'

services:
    color_controller:
        build:
            context: ../../
            dockerfile: eg6/dev1/Dockerfile
        volumes:
            - ./cyclonedds.xml:/cyclonedds.xml
        command:
            - bash
            - -c
            - |
                export CYCLONEDDS_URI=file:///cyclonedds.xml
                ros2 run my_demo_pkg color_controller
        network_mode: service:husarnet

    move_controller:
        build:
            context: ../../
            dockerfile: eg6/dev1/Dockerfile
        volumes:
            - ./cyclonedds.xml:/cyclonedds.xml
        command:
            - bash
            - -c
            - |
                export CYCLONEDDS_URI=file:///cyclonedds.xml
                ros2 run my_demo_pkg move_controller
        network_mode: service:husarnet

    husarnet:
        image: husarnet/husarnet
        restart: unless-stopped
        volumes:
            - /var/lib/husarnet  # This will persist your Husarnet Client keys, thus IP of the container will be stable/the same between (re)boots
        sysctls:
            - net.ipv6.conf.all.disable_ipv6=0  # Husarnet is using IPv6 for the internal connections
        cap_add:
            - NET_ADMIN
        devices:
            - /dev/net/tun
        env_file:
            - ./.env  # create .env file in the same folder as Dockerfile and specify HOSTNAME and JOINCODE there
<?xml version="1.0" encoding="UTF-8" ?>
<CycloneDDS xmlns="https://cdds.io/config" xmlns:xsi="http://www.w3.org/2001/XMLSchema-instance" xsi:schemaLocation="https://cdds.io/config https://raw.githubusercontent.com/eclipse-cyclonedds/cyclonedds/master/etc/cyclonedds.xsd">
    <Domain id="any">
        <General>
            <NetworkInterfaceAddress>hnet0</NetworkInterfaceAddress>
            <AllowMulticast>false</AllowMulticast>
            <MaxMessageSize>65500B</MaxMessageSize>
            <FragmentSize>4000B</FragmentSize>
            <Transport>udp6</Transport>
        </General>
        <Discovery>
            <Peers>
                <Peer address="turtlesim"/>
            </Peers>
            <ParticipantIndex>auto</ParticipantIndex>
        </Discovery>
        <Internal>
            <Watermarks>
                <WhcHigh>500kB</WhcHigh>
            </Watermarks>
        </Internal>
        <Tracing>
            <Verbosity>severe</Verbosity>
            <OutputFile>stdout</OutputFile>
        </Tracing>
    </Domain>
</CycloneDDS>
FROM osrf/ros:galactic-desktop

SHELL ["/bin/bash", "-c"]

WORKDIR /app

# build custom ROS 2 nodes
COPY ros2_ws ros2_ws/
RUN cd ros2_ws && \
    source /opt/ros/galactic/setup.bash && \
    colcon build

COPY eg6/dev1/ros_entrypoint.sh /

ENTRYPOINT ["/ros_entrypoint.sh"]
CMD ["bash"]
#!/bin/bash
set -e

source /opt/ros/galactic/setup.bash
source /app/ros2_ws/install/setup.bash

exec "$@"
Please note that Dockefile and ros_entrypoint.sh do not contain any part related to cyclonedds.xml or Husarnet VPN Container. I show here how to connect over Husarnet VPN any existing Docker Container without rebuilding them and without a custom Dockerfile!
The magic happens in docker-compose.yml:
- Sharing a VPN network interface with multiple containers is basically adding that line to as many containers you want:
network_mode: service:husarnet
- a custom DDS configuration is done using a bind-mount volume:
volumes:
  - ./cyclonedds.xml:/cyclonedds.xml
and is being applied in this fragment:
command:
  - bash
  - -c
  - |
    export CYCLONEDDS_URI=file:///cyclonedds.xml
    ros2 run my_demo_pkg color_controller
Without custom DDS configuration file it would be simply command: ros2 run my_demo_pkg color_controller. Construction:
command:
  - bash
  - -c
  - |
    <multiple command, every in a new line>
allows you to easily run a few additional commands while strarting a container.
Summary
The article presents some useful tips and tricks about using ROS 2, Docker and Docker-Compose. Basically Docker makes running even complex configurations super easy. With the help of the official Husarnet VPN Container you can easily convert your LAN based configuration to over-the-internet based configuration without modifying your existing containers at all.
You learned:
- how to run ROS 2 nodes using Docker and Docker-Compose
- how to run ROS 2 nodes on remote hosts and make your own DDS configuration
- how to share a network interface provided by only one VPN container across multiple (existing) Docker containers
I hope you will find my article useful. If you would like to comment or share your feedback, please visit the post on Husarnet community forum.