Use VPN in a Docker Container

Most of the content from this post was migrated to our Docker Platform tutorial. Content left here will be getting gradually more and more outdated.
Encapsulating software within a container brings a lot of benefits, such as quicker deployment, easier development and - last but not least - isolation of your host system from the application.
In this blog post I will show you how to install and configure a VPN client directly inside a docker container without a need of installing anything on your host system.
Thanks to that other computers from a VPN network will have access only to that container and not to your host system!
Because a container has it's own VPN IPv6 network, you can also easily move that container to other hosts without changing anything in your system configuration.
If you want to connect your existing multi-container system over the internet, then using a separate Docker VPN container will be a better move.
We cover that topic in a blog post introducing Docker VPN sidecar container.
I will show you how to do that in a few easy steps...

About
This example is really basic - we host a simple, static website with Nginx.
You can however threat this example as a reference how to install a VPN client inside a container for your own more, sophisticated projects.
The steps mentioned in the following part of the article were tested on the following host system configuration:
  Operating System: Ubuntu 20.04.1 LTS
            Kernel: Linux 5.4.0-62-generic
      Architecture: x86-64
    Docker version: 19.03.8, build afacb8b7f0
If you run your container inside a Virtual Machine, or VPS, make sure your host system has Nested Virtualization enabled.
Eg. on Virtual Box you need to run:
$ VBoxManage modifyvm your-vm-name --nested-hw-virt on
The project is avaialble on GitHub.
Basically, it consists of three files listed bellow:
- Dockerfile
- init-container.sh
- src/index.html
FROM ubuntu:20.10

# install Husarnet client
RUN apt update -y && \
    apt install -y curl && \
    apt install -y gnupg2 && \
    apt install -y systemd && \
    curl https://install.husarnet.com/install.sh | bash

RUN update-alternatives --set ip6tables /usr/sbin/ip6tables-nft

# install webserver service
RUN apt install -y nginx

# some optional modules
RUN apt install -y vim
RUN apt install -y iputils-ping

# Find your JOINCODE at https://app.husarnet.com
ENV JOINCODE=""
ENV HOSTNAME=my-container-1

# HTTP PORT
EXPOSE 80

# copy project files into the image
COPY init-container.sh /opt
COPY src /var/www/html/

# initialize a container
CMD /opt/init-container.sh
#!/bin/bash

function get_status() {
    local status="success"

    while read line; do
        if [[ $line == *"ERROR"* ]]; then
            status="waiting..."
        fi
    done
    echo $status
}

function get_ipv6() {
    local ipv6addr="::"

    while read line; do
        if [[ $line == *"Husarnet IP address:"* ]]; then
            ipv6addr=${line#*"Husarnet IP address: "}
        fi
    done

    echo $ipv6addr
}

function print_instruction() {
    local ipv6addr=$( get_ipv6 )

    echo "*******************************************"
    echo "💡 Tip"
    echo "To access a webserver visit:"
    echo "👉 http://[${ipv6addr}]:80 👈"
    echo "in your web browser 💻"
    echo "*******************************************"
    echo ""
}

sysctl net.ipv6.conf.lo.disable_ipv6=0

if [[ ${JOINCODE} == "" ]]; then
    echo ""
    echo "ERROR: no JOINCODE provided in \"docker run ... \" command. Visit https://app.husarnet.com to get a JOINCODE"
    echo ""
    /bin/bash
    exit
fi

echo ""
echo "⏳ [1/2] Initializing Husarnet Client:"
husarnet daemon > /dev/null 2>&1 &

for i in {1..10}
do
    sleep 1

    output=$( get_status < <(husarnet status) )
    echo "$output"

    if [[ $output != "waiting..." ]]; then
        break
    fi
done

echo ""
echo "🔥 [2/2] Connecting to Husarnet network as \"${HOSTNAME}\":"
husarnet join ${JOINCODE} ${HOSTNAME}
echo "done"
echo ""

# start a web server
nginx

print_instruction < <(husarnet status)

/bin/bash
<!DOCTYPE html>
<html>

<head>
    <meta charset="UTF-8" />
    <meta name="viewport" content="width=device-width, initial-scale=1.0" />
    <meta http-equiv="X-UA-Compatible" content="ie=edge" />
    <link rel="stylesheet" href="https://use.fontawesome.com/releases/v5.0.13/css/all.css"
        integrity="sha384-DNOHZ68U8hZfKXOrtjWvjxusGo9WQnrNx2sqG0tfsghAvtVlRW3tvkXWZh58N9jp" crossorigin="anonymous" />
    <link rel="stylesheet" href="https://stackpath.bootstrapcdn.com/bootstrap/4.1.1/css/bootstrap.min.css"
        integrity="sha384-WskhaSGFgHYWDcbwN70/dfYBj47jz9qbsMId/iRN3ewGhXQFZCSftd1LZCfmhktB" crossorigin="anonymous" />
    <title>Bootstrap boilerplate</title>

    <script src="websocket_client.js"></script>
</head>

<body onLoad="javascript:WebSocketBegin()">
    <header id="main-header" class="py-2 bg-success text-white">
        <div class="container">
            <div class="row justify-content-md-center">
                <div class="col-md-6 text-center">
                    <h1><i class="fas fa-cog"></i> Web Server Test</h1>
                </div>
            </div>
        </div>
    </header>

    <section class="py-5 bg-white">
        <div class="container">
            <div class="row">
                <div class="col">
                    <div class="card bg-light m-2" style="min-height: 15rem;">
                        <div class="card-header">Header 1</div>
                        <div class="card-body">
                            <h5 class="card-title">Title 1</h5>
                            <p class="card-text">
                                Text 1
                            </p>
                        </div>
                    </div>
                </div>
                <div class="col">
                    <div class="card bg-light m-2" style="min-height: 15rem;">
                        <div class="card-header">Header 2</div>
                        <div class="card-body">
                            <h5 class="card-title">Title 2</h5>
                            <p class="card-text">
                                Text 2
                            </p>
                        </div>
                    </div>
                </div>
            </div>
            <div class="row">
                <div class="col">
                    <div class="card bg-light m-2">
                        <div class="card-header">Header 3</div>
                        <div class="card-body">
                            <h5 class="card-title">Tutle 3</h5>
                            <p class="card-text">
                                Text 3
                            </p>
                        </div>
                    </div>
                </div>
            </div>
        </div>
    </section>
</body>

</html>
You could notice that init-container.sh seems to be long, however mainly due to a rich terminal log. The same result might be achieved in much shorter, but less informative way:
# enable IPv6 needed by lower layers of VPN
sysctl net.ipv6.conf.lo.disable_ipv6=0

# start a daemon
husarnet daemon > /dev/null 2>&1 &

# delay to make sure VPN daemon started
sleep 5

# join to VPN network using its unique Join Code
husarnet join ${JOINCODE} ${HOSTNAME}
In the last line we provide hostname for a container (whatever you like), and a Join Code - kind of unique access token for a VPN network. In the next sections I will show you where to find it.
After short intro, let's get started!
Running an example
Getting the code
git clone https://github.com/husarnet/blog-examples.git
cd blog-examples/docker-vpn/
Building an image
Make sure init-container.sh is executable. If not:
sudo chmod +x init-container.sh
Then build an image:
sudo docker build -t docker-vpn .
Starting a container
Execute in a Linux terminal:
sudo docker run --rm -it \
--env HOSTNAME='docker-vpn-1' \
--env JOINCODE='fc94:b01d:1803:8dd8:3333:2222:1234:1111/xxxxxxxxxxxxxxxxx' \
-v docker-vpn-v:/var/lib/husarnet \
-v /dev/net/tun:/dev/net/tun \
--cap-add NET_ADMIN \
--sysctl net.ipv6.conf.all.disable_ipv6=0 \
docker-vpn
description:
HOSTNAME='docker-vpn-1'- is an easy to use hostname, that you can use instead of Husarnet IPv6 addr to access your container over the internetJOINCODE='fc94:b01d:1803:8dd8:3333:2222:1234:1111/xxxxxxxxxxxxxxxxx'- is an unique Join Code from your Husarnet network.
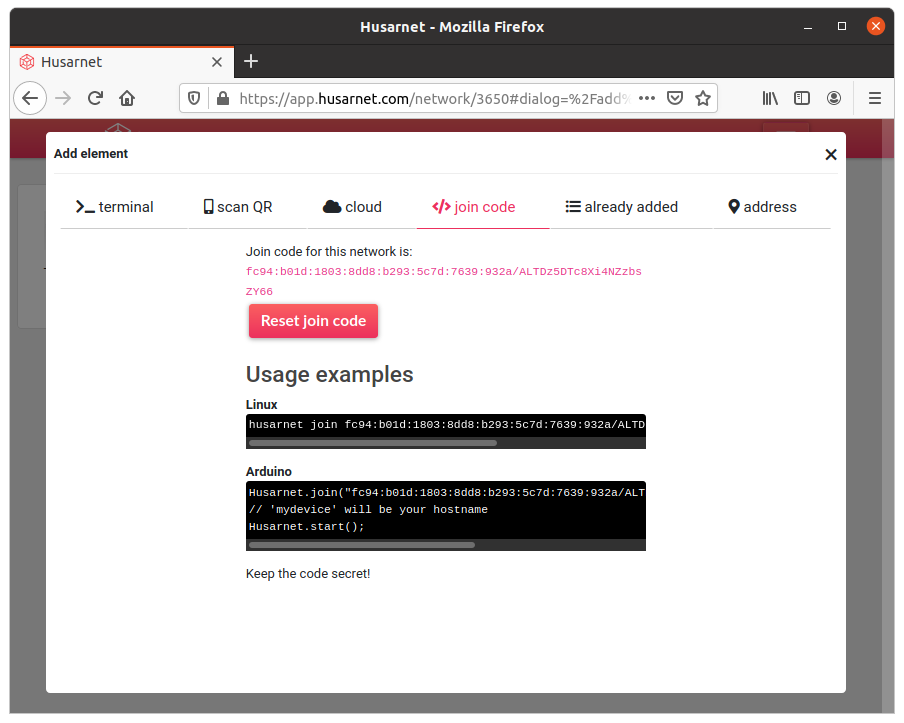
You will find it at:
https://app.husarnet.com -> choosen network -> [Add element] button -> join code tab
-v my-container-1-v:/var/lib/husarnet- you need to make/var/lib/husarnetas a volume to preserve it's state for example if you would like to update the image your container is based on. If you would like to run multiple containers on your host machine remember to provide unique volume name for each container (in our caseHOSTNAME-v).
If you also want to modify index.html file in your IDE, and see changes in your container withour re-executing docker build command, create a bind mount by adding also this flag in the docker run command:
-v "/home/blog-examples/docker-vpn/src:/var/www/html/:ro" \
remember to provide a full path to your src folder!
Results
After running a container you should see a log like this:
blog-examples/docker-vpn$ sudo docker run --rm -it \
> --env HOSTNAME='docker-vpn-1' \
> --env JOINCODE='fc94:b01d:1803:8dd8:b293:5c7d:7639:932a/xxxxxxxxxxxxxxxxxxxxxx' \
> -v docker-vpn-v:/var/lib/husarnet \
> -v "/home/blog-examples/docker-vpn/src:/var/www/html/:ro" \
> -v /dev/net/tun:/dev/net/tun \
> --cap-add NET_ADMIN \
> --sysctl net.ipv6.conf.all.disable_ipv6=0 \
> docker-vpn

⏳ [1/2] Initializing Husarnet Client:
waiting...
waiting...
waiting...
waiting...
success

🔥 [2/2] Connecting to Husarnet network as "docker-vpn-1":
[101617015] joining...
[101619016] joining...
done

*******************************************
💡 Tip
To access a webserver visit:
👉 http://[fc94:5e70:7ab8:5880:79d6:119d:c65e:fd3f]:80 👈
in your web browser 💻
*******************************************

root@3fb1b9a13cba:/#
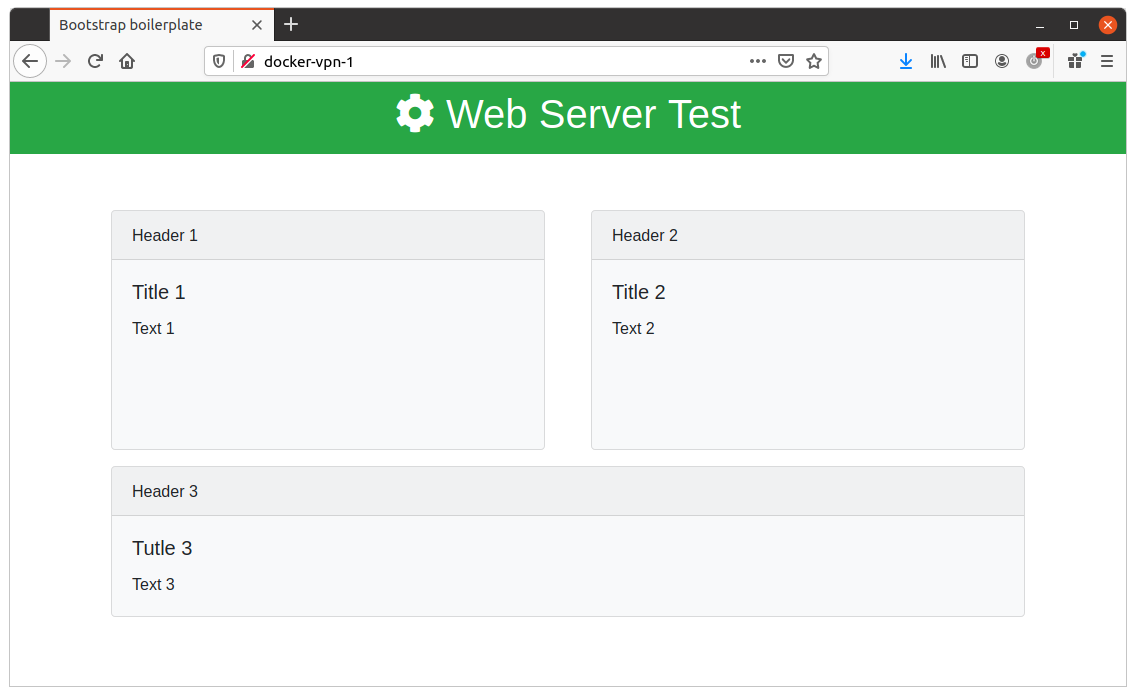
At this point any computer that is in the same Husarnet VPN network as your container, can access a webserver by using docker-vpn-1 hostname or by using a containers IPv6 address as described in a log output from a container above.
You should see something like this 👇
Summary
I presented in this article:
- how to write a Dockerfile for creating a container image with pre-installed VPN client
- how to run a simple website with external access only for computers from the same VPN network
I hope you will find this article helpful.
In case of any questions related to this blog post please contact us using Husarnet Community Forum or via email at support@husarnet.com.