ESP32 OTA Over The Internet

There are a lot of examples on the internet about how to perform OTA (Over-The-Air firmware update) to your ESP32 as long as your chip is in the same LAN as your computer.
While Husarnet is basically a VPN software which works not only on your laptop, but also on your ESP32, it's easy to port exisitng OTA examples to work over the Internet. I'll show you how to to that.
The article you are reading became quite popular over the last year. This is why I created a "follow-up" project showing you how to integrate presented OTA update with GitHub Actions:
https://github.com/husarnet/esp32-internet-ota
Read more about Husarnet Action for GitHub Actions that is used in the project.
What OTA library should I choose?
There are a buch of possibilites, such as:
In this blog post, we will focus on AsyncElegantOTA, as it is based on AsyncTCP library which allows multi-connection and is a base for many great projects such as ESPAsyncWebServer.
Let's start
I created a basic demo based on example from AsyncElegantOTA. Basically it works the same way, but not only over LAN but also over the Internet.
The complete project is available here, so if you are familiar with Husarnet and platformio, you can drop the rest of the article and just do the following:
git clone https://github.com/DominikN/esp32-ota-asyncdemo
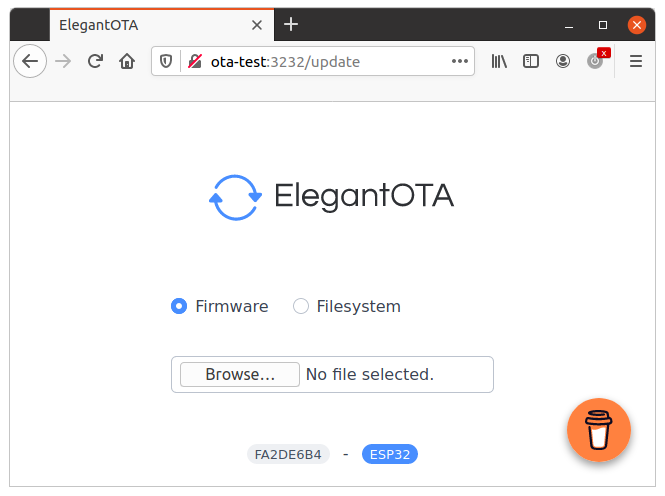
After you place your Wi-Fi SSID & Password and Husarnet join code in the *.ino file and flash your firmware to ESP32, the OTA website will be hosted on ESP32 under the following URL (on Firefox): http://ota-test:3232/update.
Modify the existing example
To make it work over the Internet, only a few new lines were added to the basic example:
#include <WiFi.h>
#include <AsyncTCP.h>
#include <ESPAsyncWebServer.h>
#include <AsyncElegantOTA.h>
#include <Husarnet.h>

// WiFi credentials
const char *ssid = "MY_WIFI_SSID";
const char *password = "MY_WIFI_PASS";

// Husarnet credentials
const char *hostName = "ota-test";
const char *husarnetJoinCode = "fc94:b01d:1803:8dd8:b293:5c7d:7639:932a/xxxxxxxxxxxxxxxxxxxxxxx"; // find at app.husarnet.com
const char *dashboardURL = "default";

AsyncWebServer server(3232);

void setup(void)
{
  Serial.begin(115200);
  WiFi.mode(WIFI_STA);
  WiFi.begin(ssid, password);
  Serial.println("");

  // Wait for connection
  while (WiFi.status() != WL_CONNECTED)
  {
    delay(500);
    Serial.print(".");
  }
  Serial.println("");
  Serial.print("Connected to ");
  Serial.println(ssid);
  Serial.print("IP address: ");
  Serial.println(WiFi.localIP());

  // Start Husarnet
  Husarnet.selfHostedSetup(dashboardURL);
  Husarnet.join(husarnetJoinCode, hostName);
  Husarnet.start();

  server.on("/", HTTP_GET, [](AsyncWebServerRequest *request) {
    request->send(200, "text/plain", "Hi! I am ESP32.");
  });

  AsyncElegantOTA.begin(&server); // Start ElegantOTA
  server.begin();
  Serial.println("HTTP server started");
}

void loop(void)
{
  AsyncElegantOTA.loop();
}
So you need to include the Husarnet library:
#include <Husarnet.h>
Define your Husarnet credentials:
const char *hostName = "ota-test";
const char *husarnetJoinCode = "fc94:b01d:1803:8dd8:b293:5c7d:7639:932a/xxxxxxxxxxxxxxxxxxxxxxx"; // find at app.husarnet.com
const char *dashboardURL = "default";
And start Husarnet service:
  // Start Husarnet
  Husarnet.selfHostedSetup(dashboardURL);
  Husarnet.join(husarnetJoinCode, hostName);
  Husarnet.start();
After that, Husarnet service, working in a background, handles the traffic over the Internet, and the rest of your code can simply use AsyncTCP based code, the same way as it was running in the LAN!
To find a husarnetJoinCode you need to setup an account at https://app.husarnet.com/ (Free account, with no credit card required, up to 5 devices is available), then create a new network and click [Add element] button. You will find your secret join code under join code tab.
Create a platformio.ini file
The simplest way to deal with different versions of libraries and configurations for your ESP32 project is to use platformio IDE - an extension for Visual Studio Code.
The whole configuration for your project is included in platformio.ini file, so you don't need to manually install appropriate libraries or setup platform specific environmental variables. In our case the file looks like that:
[env]
platform = espressif32
framework = arduino
platform_packages =
    framework-arduinoespressif32 @ https://github.com/husarnet/arduino-esp32/releases/download/1.0.4-1/arduino-husarnet-esp32.zip
lib_deps =
    ; Until our pull requests are merged you need to use AsyncTCP with our fixes for IPv6
    https://github.com/husarnet/AsyncTCP.git
    Husarnet ESP32
    ESP Async WebServer
    ayushsharma82/AsyncElegantOTA @ ^2.2.5

[env:esp32dev]
board = esp32dev
monitor_speed = 115200
upload_speed = 921600

monitor_filters = esp32_exception_decoder, default
board_build.partitions = partitions_custom.csv
Create a custom partition table file
Note that in platformio.ini we have defined a custom ESP32 partition table file: partitions_custom.csv. It looks like this:
# Name,   Type, SubType, Offset,  Size, Flags
nvs,      data, nvs,     0x9000,  0x5000,
otadata,  data, ota,     0xe000,  0x2000,
app0,     app,  ota_0,   0x10000, 0x180000,
app1,     app,  ota_1,   0x190000,0x180000,
spiffs,   data, spiffs,  0x310000,0xF0000,
It is a slightly modifed default.csv file. I have increased the size of partitons for app0 (the current firmware running on ESP32) and app1 (a place where a new firmware will be stored during the updating process). If your firmware.bin file will be too large for app0 and app1 you can increase these partitions at the expense of spiffs partition or just use ESP32 with more flash memory.
Flashing ESP32 using a web browser over the Internet
You also need to add your laptop to the same Husarnet network as you ESP32. To do that:
- Install Husarnet Client on your laptop, by executing in the Linux terminal:
curl https://install.husarnet.com/install.sh | sudo bash
- After installation process is finished, execute the following command:
sudo systemctl restart husarnet
- Connect your laptop to the same Husarnet network as ESP32, by using the same join code as you previously used in the code for ESP32:
sudo husarnet join fc94:b01d:1803:8dd8:b293:5c7d:7639:932a/xxxxxxxxxxxxxxxxxxxxxxx
Now open your web browser and type: http://ota-test:3232/update (on Firefox) or http://[fc94:xxxx:xxxx:xxxx:xxxx:xxxx:xxxx:d395]:3232/update (on other browsers - Husarnet IPv6 address of your ESP32 you will find at https://app.husarnet.com/).
Summary
That's all guys. I hope this simple guide about using Husarnet to enable over the Internet firmware flashing (without using any additional update server) will be useful. In case of any questions related to this blog post please contact us using Husarnet Community Forum or via email at support@husarnet.com.