Husarnet Dashboard web app manual/documentation
This manual describes how to use Husarnet Dashboard web app which public version is available under this link: https://app.husarnet.com .
Husarnet Dashboard allows you to:
- Create and remove Husarnet networks (your device can be in one or multiple Husarnet networks at the same time).
- Removing devices or adding them to your networks in a few ways (websetup, join code, QR code, already linked to your account)
- Share your Husarnet networks to other users with configurable access rights.
- Check your devices' information (IPv6 address, online/offline status, who is the owner etc.)
- in commercial plans accessing your billing data and managing subscriptions.
- accessing your Dashboard API tokens (available only in some of commercial plans)
Create a network
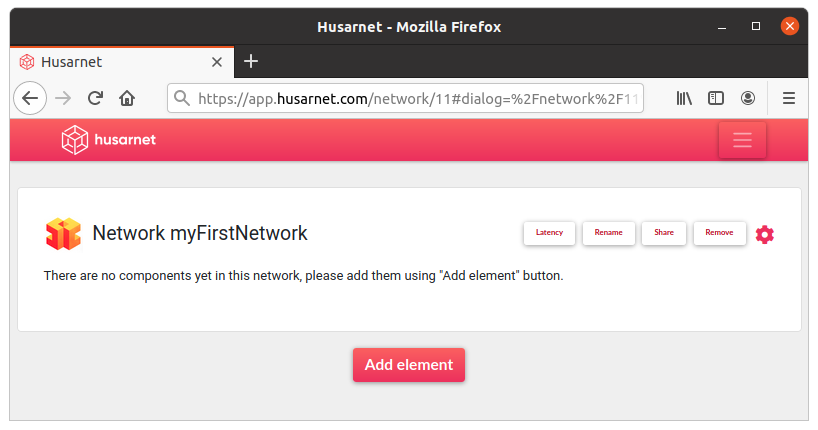
To create a new Husarnet network, log into Husarnet Dashboard main panel, click [Create network] button, in the pop-up choose a name and click [Create] button. Newly created, empty network panel will open that looks like this:
You can change network view setting by clicking a [red cog icon] on the right where you will find the following options:
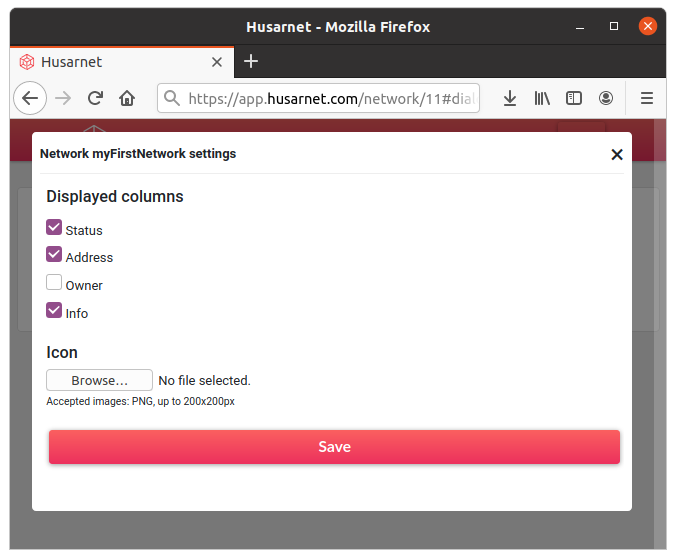
You can choose which information you would like to display in the specific network panel:
- Status of each device (online/offline)
- Address - Husarnet IPv6 address of each device
- Owner of the specific device in the network. Because you can share your network to other users, thanks to that column you will see which user is the owner of the given device.
- Info some extra information about the specific device like
ROS master
or otpion to access aWeb UI
if you configure it.
You can also change a default icon that allows you to easily distinguish your specific network from others. Remember to use only 200x200px PNG images here!!!.
Add devices to existing network
After you click [Add element] button you will see a pop-up looking like this:
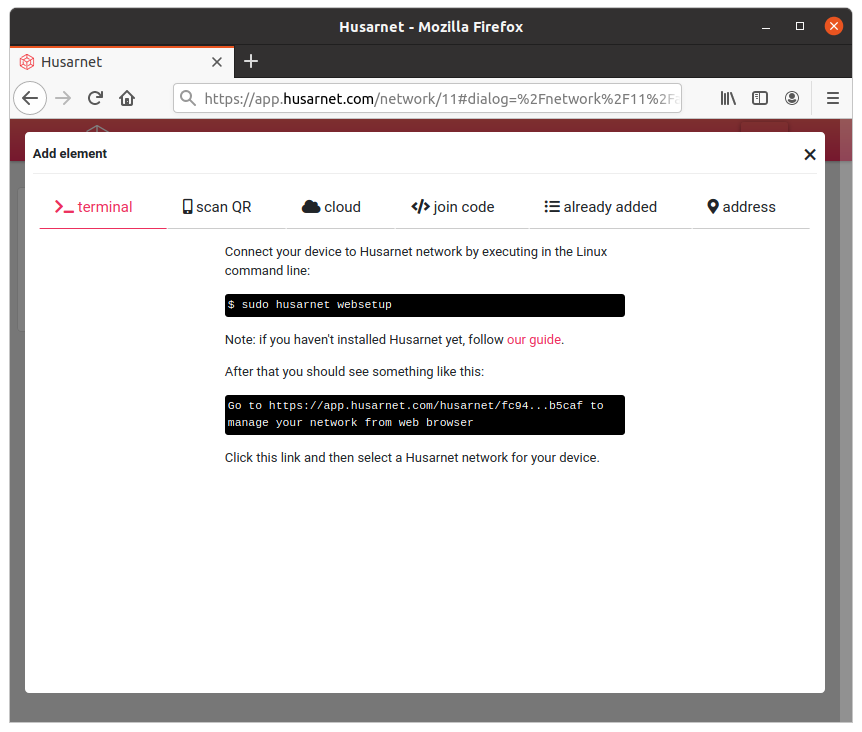
Now you can add new devices in a few ways:
[terminal tab]
This method shows how to use husarnet websetup
command which you need to execute from the level of command line on devices with Husarnet Client. After executing this command, the unique link is generated. If you open it in the web browser, and you are logged into your Husarnet Dashboard account you will see something like this:
Name your device here (this hostname will be used by other devices in your Husarnet networks to reach your devices as a second way next to just using Husarnet IPv6 address) and select a network from your Husarnet Dasbhoard account to which you want to add this device. By selecting a checkbox Change device hostname to [hostnameYouJustUsed]. Recommended for ROS
, also the hostname in your OS level will be changed. In other words if you will open your Linux terminal you will see:
user@hostnameYouJustUsed:~$ _
For more information visit Husarnet Client manual.
[scan QR tab]
Adding devices with QR codes is supported currently only by experimental apps that are not publically released yet.
This method is dedicated mainly for connecting mobile phones to the Husarnet network. Husarnet Client Android app is not released yet, but after release it will be connected to Husarnet Dashboard that way.
Beta version of Husarnet Client for Android looks like this:

After clicking Scan QR code button in Husarnet Client for Android app you will be asked for a permision to your camera by Android OS and when you agree, you will be able to scan a QR code displayed in the scan QR tab in Husarnet Dashboard. That's a very handy way to connect devices equipped with camera to your Husarnet networks.
[cloud tab]
Husarnet Marketplace is currently a closed beta functionality. If you are interested in testing it, please contact us via an email at contact@husarnet.com and describe your use-case.
This tab allows you to add preconfigured, hosted on public cloud microservices to your existing Husarnet networks.
These microservices are seen from a level of other devices in the network as separate devices. Currently available microservices in our beta program are:
- web terminal you can SSH your Husarnet devices from a level of https://app.husarnet.com from any devices if you only know credentials to your account (even outside Husarnet network)
- ROS SLAM implementations this microservice could be used by your ROS robots for outsourcing computation heavy task of simultanously localization and map creation.
Cloud microservices will not be available for Self-hosted plans.
[join code tab]
This is a second, next to websetup
, way to connect your device to Husarnet network using a Linux command line, that is also described in the first start guide for Linux. If you have many devices that you want to connect to your Husarnet network at once, or you do not have access to a web browser this method is the most convenient.
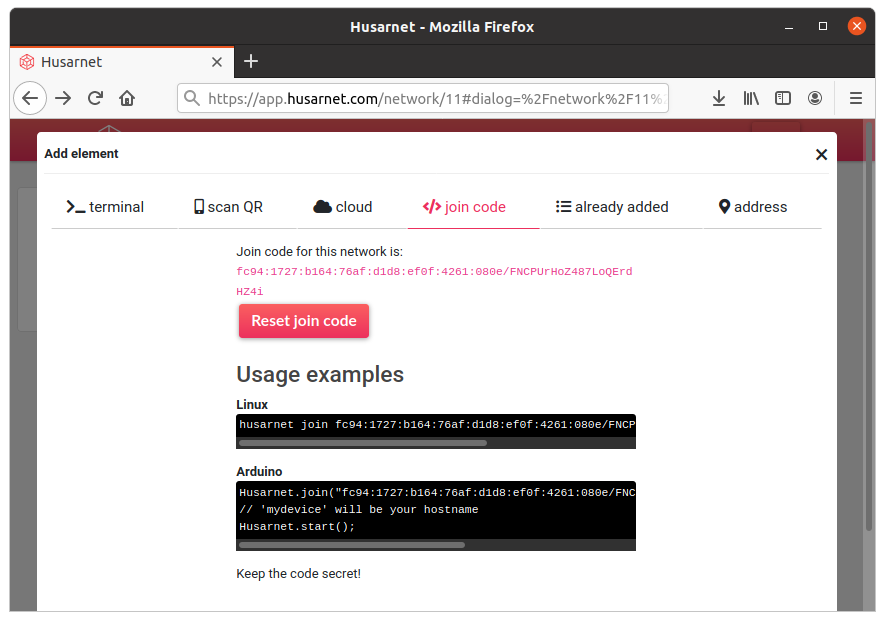
Keep your join code secret! If you consider your join code might be compromised, click [Reset join code] button in a [join code] tab. Devices that already were connected using previous join code, still will be in you Husarnet networks, however previous join code will not be valid for adding new devices to your networks.
Usage example:
husarnet join fc94:xxxx:xxxx:xxxx:xxxx:xxxx:xxxx:932a/xxxxxxxxxxxxxxxxxxxxxx mydevhostname
Output example:
johny@johnylaptop:~$ sudo husarnet join fc94:xxxx:xxxx:xxxx:xxxx:xxxx:xxxx:932a/xxxxxxxxxxxxxxxxxxxxxx johnylaptop
[sudo] password for johny:
[16699016] joining...
[16701017] joining...
johny@johnylaptop:~$
[already added tab]
If you already have connected your device to Husarnet Dashboard you can add it to other networks this way. One device could be in one or multiple networks at once.
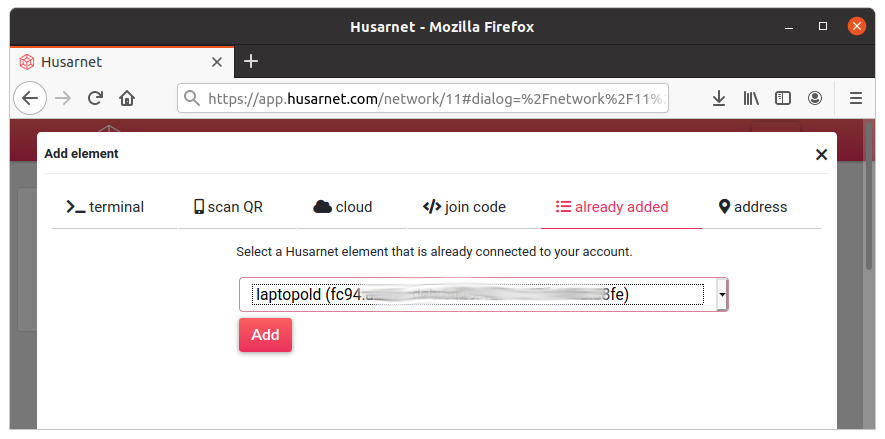
All your devices already connected to your account are available under the dropdown menu. Just select device you would like to add to the given network and click [Add] button
[address tab]
As described in the Husarnet Client manual you can manually add other devices to the whitelist if only you know their Husarnet IPv6 address. Instead of using command line, you can add new devices to the whitelist by using this tab.
https://app.husarnet.com will not manage the whitelist on this device, for example you will not see whether it is online or offline.
Sharing networks to other users
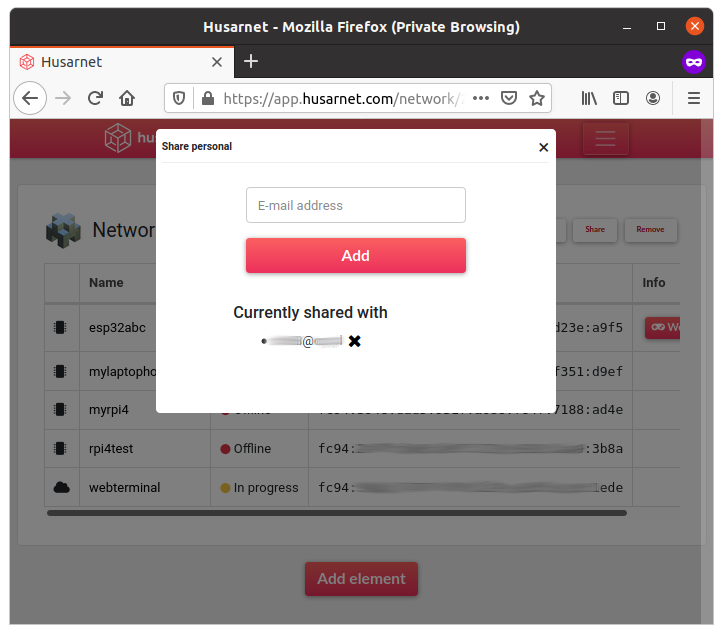
To share a network you need at first to open that network and click [Share] button in the top panel. You will see a new pop-up where you can place account names (email addresses used during registration on Husarnet Dashboard) of users to whom you want to share your network.
Below, there is a list of users that already have access to your network. You can remove access to given users by clicking [X] button that is located next to each email.
When you share a network to a specific user, this user will see your invitation as pending:
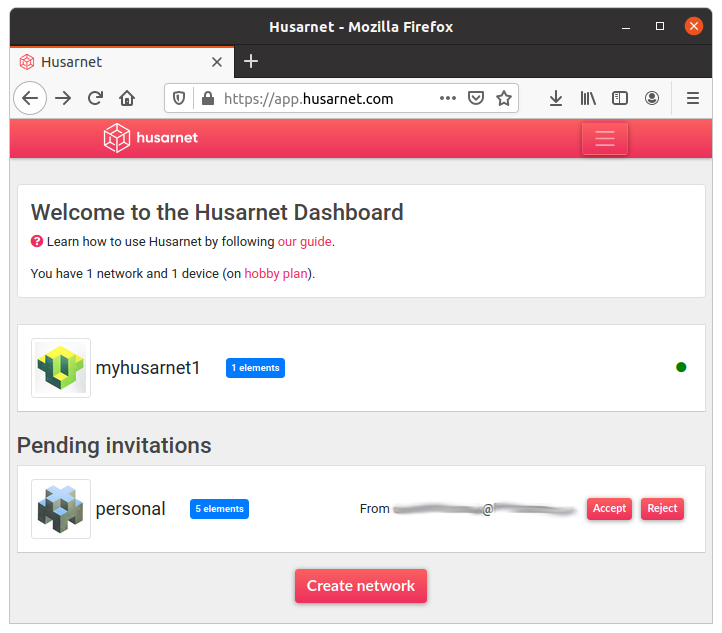
After clicking [Accept] button this networks will be listed next to other networks of the user. If the user no longer wants to have access to a network somebody shared, he needs to open a shared network, and click a [Unshare] button.
Accessing web UI hosted by devices
Husarnet Dashboard provides a service that makes it possible to access HTTP server running on a Husarnet device using standard web browser over the internet (i.e. without Husarnet installed).
If there is a HTTP server listening on port 8000 on the Husarnet interface, "Web UI" button will appear in the network screen.
Clicking the button will navigate you to a page with URL like https://XXXX.husarnetusers.com
. On that address there is a server that securely proxies the requests to your device. The page is available only to you (and requires you to login to your account). That proxy server is very limited, so this feature is for simple web UI sending small amount of data - like a web UI of IoT sensor. If you would like to access a web UI with high datarate and low latency, connect to it from a level o Husarnet network directly, not over the proxy server.
Login page will always have URL starting with https://app.husarnet.com/
.
husarnetusers.com
URLs are controlled by users and you should not trust them implicitly.
Public Web UI
By default, the interface is accessiable only to you. However, you can make the web UI public, so anyone who knows the address, will be able to access the interface.
To make the interface public, open element settings (by clicking its name in the network screen) and toggle "Make the Web UI public" checkbox. Then you can copy the address of the page accessible using [Open Web UI] button and send it to someone.
Everyone will be able to access the Web UI! Make sure it is written in a secure way. Most elements from the Husarnet Marketplace assume that they won't be made public.
Details
The Web UI URL has a form of https://fcXXXXXXXXXXXXXX-PORT.husarnetusers.com
where fcXXXXXXXXXXXXXX
is the Husarnet device IP (without colons) and PORT
is the TCP port of the service running on a device. For security, only ports 8000 and 8001 are allowed. URLs in a form of https://fcXXXXXXXXXXXXXX-PORT.husarnetusers.com/__port_PORT2/
(e.g. https://fcXXXXXXXXXXXXXX-8000.husarnetusers.com/__port_8001/
) are special - PORT2 overwrites PORT. This form is useful for accessing websocket servers.