Husarnet Documentation
With Husarnet you can connect any device (laptops, servers, VMs, containers, microcontrollers etc.) with any interface (Wi-Fi, LTE/5G, Ethernet) into a peer-to-peer Virtual Private Network that works over the Internet with no configuration.
If you want to know more about the internals How Husarnet works is a great start.
Support
Our preferred way of support is through Husarnet Community.
If you want you can reach us at support@husarnet.com too.
Husarnet Dashboard
Husarnet Dashboard is a platform for managing all your Client instances. You can create groups/check statuses/rename nodes and a lot more there.
In the Husarnet Dashboard Quick Start guide, you'll find all the important bits and pieces of information to become a poweruser.
Husarnet Client
Husarnet Client is open source and available for all supported platforms at: https://github.com/husarnet/husarnet
For typical "quickstart" setup, choose your platform below and see installation instructions. Alternative approaches and extended guides for all the platforms can be found in the sidebar on the left, in the "Platforms" section.
- Linux
- Windows
- Container
- GitHub Actions
- ESP32
- MacOS
- Android ⏳
Husarnet Client for Linux
Supported architectures: i386, x64 (amd64), armhf, arm64, riscv64
Choose your Linux distribution:
- Debian, Ubuntu, CentOS, RHEL, Fedora, Mint or Arch
- Other distributions
For APT, pacman and yum based Linux the simplest way to install Husarnet is to paste the following line into your terminal:
curl https://install.husarnet.com/install.sh | sudo bash
Now export your Join Code as environment variable:
export JOINCODE=fc94:b01d:1803:8dd8:b293:5c7d:7639:932a/XXXXXXXXXXXXXXXXXXXXXX
To join your device to Husarnet network, execute:
sudo husarnet join $JOINCODE some-hostname
If your Linux distribution is not supported by the one-command install method, you can also download the binary package. For most seamless experience, it is recommended to unpack it in the root directory (/):
curl https://install.husarnet.com/tar/husarnet-latest-amd64.tar > husarnet-latest-amd64.tar
sudo tar --directory=/ --no-same-owner --dereference -xf husarnet-latest-amd64.tar
(replace -amd64 with -armhf, -arm64 or -i386 if you don't have 64-bit Intel/AMD processor)
If you are using systemd, enable and start the service:
systemctl enable husarnet
systemctl start husarnet
otherwise start the Husarnet Daemon manually:
husarnet daemon &
Now export your Join Code as environment variable:
export JOINCODE=fc94:b01d:1803:8dd8:b293:5c7d:7639:932a/XXXXXXXXXXXXXXXXXXXXXX
To join your device to Husarnet network, execute:
sudo husarnet join $JOINCODE some-hostname
Husarnet Client container (sidecar)
Supported architectures: x64 (amd64), armhf, arm64
Choose a preffered method for running containers:
- docker run
- docker compose
- ansible
To start a Husarnet Sidecar container execute:
export JOINCODE=fc94:b01d:1803:8dd8:b293:5c7d:7639:932a/XXXXXXXXXXXXXXXXXXXXXX

docker run -it \
--name husarnet-vpn \
--env JOINCODE=$JOINCODE \
--env HOSTNAME='testing-container' \
--env HUSARNET_DEBUG=1 \
--volume husarnet-vol:/var/lib/husarnet \
--device /dev/net/tun \
--cap-add NET_ADMIN \
--sysctl net.ipv6.conf.all.disable_ipv6=0 \
husarnet/husarnet:latest
replace
fc94:...:932a/XXX...XXXXXwith your own Join Code
Now to give other containers on the same host access to your Husarnet network (using wordpress container as an example):
docker run -it \
--network container:husarnet-vpn \
--volume wordpress-vol:/var/www/html \
wordpress
Now you should be able to access a wordpress boilerplate in a browser of any computer connected to the same Husarnet network by using: http://testing-container:80 (because wordpress is hosted on port 80 by default)
To start a Husarnet Sidecar container that provides over-the-internet access for your application containers (in the example below - for wordpress), create a compose.yaml file:
services:
  my-website:
    image: wordpress
    network_mode: service:husarnet
    volumes:
      - /var/www/html

  husarnet:
    image: husarnet/husarnet:latest
    volumes:
      - /var/lib/husarnet
    sysctls:
      - net.ipv6.conf.all.disable_ipv6=0
    cap_add:
      - NET_ADMIN
    devices:
      - /dev/net/tun
    environment:
      - HOSTNAME=testing-container
      - JOINCODE
      - HUSARNET_DEBUG=1
And execute:
export JOINCODE=fc94:b01d:1803:8dd8:b293:5c7d:7639:932a/XXXXXXXXXXXXXXXXXXXXXX
docker-compose up
replace
fc94:...:932a/XXX...XXXXXwith your own Join Code
Now you should be able to access a wordpress boilerplate in a browser of any computer connected to the same Husarnet network by using: http://testing-container:80 (because wordpress is hosted on port 80 by default)
Running with network_mode: host
If you need to remove additional NAT layer provided by Docker network, you can run Husarnet container with network_mode: host. It will create additional network interface hnet0 directly on the host OS layer.
services:
  my-website:
    image: wordpress
    network_mode: host
    volumes:
      - /var/www/html

  husarnet:
    image: husarnet/husarnet:latest
    network_mode: host
    volumes:
      - /var/lib/husarnet
    cap_add:
      - NET_ADMIN
    devices:
      - /dev/net/tun
    environment:
      - HOSTNAME=testing-container
      - JOINCODE
      - HUSARNET_DEBUG=1
To start a Husarnet Sidecar container that provides over-the-internet access for your application containers (in the example below - for wordpress), create a playbook.yml file:
- name: Wordpress available over Husarnet
  hosts: localhost

  tasks:
  - name: Running Husarnet
    community.docker.docker_container:
      name: husarnet
      image: husarnet/husarnet:latest
      restart_policy: unless-stopped
      volumes:
        - /var/lib/husarnet
      sysctls:
        net.ipv6.conf.all.disable_ipv6: 0
      capabilities:
        - net_admin
      devices:
        - "/dev/net/tun:/dev/net/tun:rwm"
      env:
        HOSTNAME: testing-container
        JOINCODE: fc94:b01d:1803:8dd8:b293:5c7d:7639:932a/XXXXXXXXXXXXXXXXXXXXXX

  - name: Running Wordpress
    community.docker.docker_container:
      name: my-website
      image: wordpress
      volumes:
        - wordpress:/var/www/html
      network_mode: "container:husarnet"
replace
fc94:...:932a/XXX...XXXXXwith your own Join Code
And execute:
ansible-playbook playbook.yml
Now you should be able to access a wordpress boilerplate in a browser of any computer connected to the same Husarnet network by using: http://testing-container:80 (because wordpress is hosted on port 80 by default)
Husarnet Action for GitHub Actions
Supported runners hosted by GitHub: ubuntu-20.04, ubuntu-22.04, ubuntu-latest
To use Husarnet in your GitHub workflow, create a .github/workflows/my-husarnet-workflow.yml file with the following content in your GitHub repository:
name: Ping other peer from a VPN network

on: push

jobs:
  build:
    runs-on: ubuntu-20.04
    steps:

    - name: Connecting to Husarnet VPN network
      uses: husarnet/husarnet-action@v5
      with:
        join-code: ${{ secrets.HUSARNET_JOINCODE }}

    - name: Ping other peer
      run: ping6 -c 10 my-laptop
Create a new GitHub secret: HUSARNET_JOINCODE and place your Join Code there.
Now after each commit, my-laptop device (we assume that it is in the same Husarnet network) will be pinged 10 times.
Husarnet Action source code is here: https://github.com/husarnet/husarnet-action
This quickstart guide bootstraps a simple web server on an ESP32 microcontroller in the native ESP-IDF framework. Partial support for Platformio is provided through the Arduino as a component configuration. We are working on making it possible to use the Husarnet library in Arduino IDE or standard Arduino ESP32 PlatformIO projects.
Install the ESP-IDF framework following the official guide first! Remember to source the ESP-IDF environment variables before running the idf.py commands.
Currently ESP-IDF versions v4.4+ or v5.0+ are supported. Simple webserver example can be set up in a few steps:
Create a new project using idf.py tool:
idf.py create-project-from-example "husarnet/esp_husarnet:husarnet-web-server"
cd husarnet-web-server
Select your target microcontroller (eg. ESP32-S3):
idf.py set-target esp32s3
Edit the main/husarnet-web-server.c file and replace the join_code and hostname with your own Husarnet join code and hostname obtained from the Husarnet Dashboard:
#define HOSTNAME "husarnet-esp32"
#define JOIN_CODE "fc94:b01d:1803:8dd8:b293:5c7d:7639:932a/XXXXXXXXXXXXXXXXXXXX"
Provide your Wi-Fi credentials by running:
idf.py menuconfig
Put your Wi-Fi SSID and Wi-Fi password in the Example Connection Configuration section.
Finally, build and flash the project:
idf.py build && idf.py flash
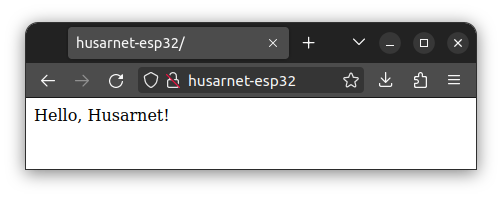
After a few seconds your first HTTP webserver on ESP32 should be available on every device in your Husarnet network under the provided hostname URL: http://husarnet-esp32.
URL used above won't work on Chrome and Chromium-based browsers as they ignore the hosts file. Husarnet uses it to allow resolution of device names to Husarnet IPv6 addresses. You will need to type the IPv6 address enclosed with square brackets directly in the browser (eg. http://[fc94:b01d:1803:8dd8:b293:5c7d:7639:932a]).
Under Firefox everything should work ok.
API reference can be found here. In case of any issues, refer to the Husarnet ESP32 troubleshooting guide and the Husarnet Community Forum.
Husarnet Client for Windows
Caution: Only 64-bit Windows is supported.
Download latest Husarnet Windows installer and run the executable.
You are likely to get SmartScreen popup from Windows; unfortunately, Windows considers unsigned .exe files as a threat to system security. Click on [More info] and you'll be able to run the installer as you would install any software on Windows.
After installer finishes working, service will start and you should be able to use Husarnet through the command line. Run cmd.exe or PowerShell and type:
husarnet status
If you see errors, try running elevated command prompt (Right-click and Run as administrator...)
If output looks OK, use Join Code to join a network:
husarnet join <JOINCODE> my-windows-dev
Husarnet Client for MacOS [ALPHA]
Caution: Our MacOS client is Work-in-Progress. Some things might not yet work exactly like in Linux client, and stability is not guaranteed. Feel welcome to report bugs and remarks on our Community Forums.
Caution: Currently, we only support Apple Silicon devices (ARM64)
The binaries are available through Homebrew. You need to add our 'nightly', tap, as MacOS client is not yet in stable.
brew tap husarnet/tap
brew install husarnet
After installation finishes, you have to start the daemon and install it into launchctl, this is done via single command (requires sudo):
sudo husarnet daemon service-install
After couple of seconds you can check the status:
husarnet status
If the output looks OK, use Join Code to join a network:
husarnet join <JOINCODE> my-windows-dev
Husarnet Client for Android
is coming soon ... ⏳